Hey there! I’m sharing this writeup to document my learning journey and thought process. This is all about exploring and understanding things better - just my personal notes and observations that I wanted to share.
Backstory
Several weeks ago, Pearl Abyss (PA) released an update to Black Desert Online (BDO) that added a bunch of new fish to the game. With several new fish - and absolutely no idea where they are - people started flocking all over the BDO world in search of new valuable fish. But there is a catch (see what I did there? :D): the fishing areas are quite small, and overall, a player has no way of knowing if they are in the correct spot other than simply starting to catch fish and hoping.
And that’s how the idea of the waypoints came to be.
But not all hope was lost, as over time, there have been some major and minor leaks in Black Desert Online that have provided insights into how the fishing areas in the game work and where they are.
In BDO, there are several fish groups (drop groups) per fishing spot, which can be rolled when fishing there. Each group has a certain probability of being rolled, and within that group, the individual fish - only one fish per group will be rolled - also have a set chance. All the new fish are so-called prize fish, which are the rarest class of fish but also the most valuable.
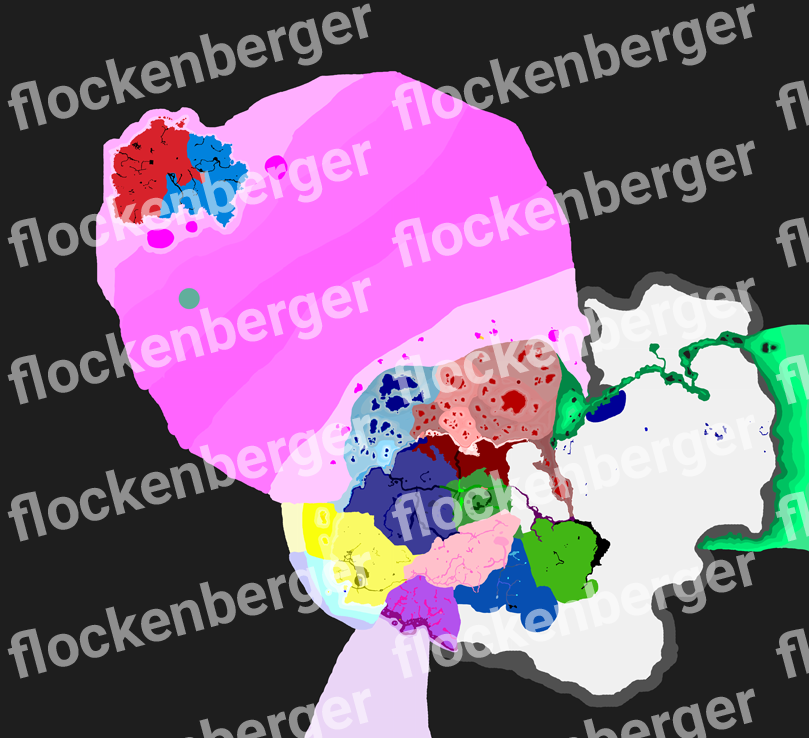
But how does the game determine which group to roll, you might ask? Well, BDO’s fishing system works with a large-scale image where each fishing spot has unique RGB colors. Each RGB color is mapped to the previously mentioned drop groups in a table. The game determines the fishing tables mentioned earlier by converting your in-game position (to be exact, it uses the position where your fishing rod lands) into 2D image coordinates and checking which color you land on. Based on that color, the game knows which group to roll.
Below, you can see a (slightly) customized version of the fishing map. Black is usually an invalid color for the regions, but I placed it there because these regions have fish tables (and colors) that are unknown as of writing this.
The Waypoint Favorites
With all of the above in mind, the goal was now to utilize BDO’s waypoint favorites function to store custom-generated waypoints for each fishing region.
There were several things to consider beforehand: Where are the waypoints stored, and how do you even generate the waypoints from the images?
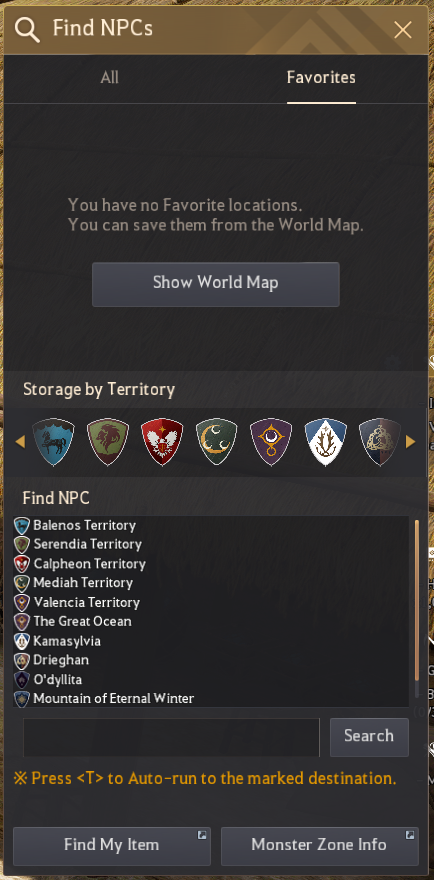
Incidentally, the idea of using waypoints for the fishing regions wasn’t my own but came from a user on the same Discord server I was on, who asked if anyone knew the format of a certain cache file. This was the first lead - and luckily, the only lead needed - to figuring out where these were stored. As I’ll discuss later in this write-up, the file in which these waypoints are stored, and the way they are stored, completely changed, making it both easier as well as, eh… less invasive (and less - or more depending who you ask - in violation of the Operation Policy) to modify certain files or values.
With that in mind, I now knew where to store the files. Since this file is no longer used (at all), I’ll provide a Kaitai Struct snippet of how the file structure looks. Pearl Abyss generally loves their binary files, and I love reversing their structure, so that works out perfectly - hehe. Kaitai Struct is a lovely declarative YAML-like language for defining binary structures. Kaitai then allows you to generate parsers for various programming languages, making it quite easy to reverse structures.
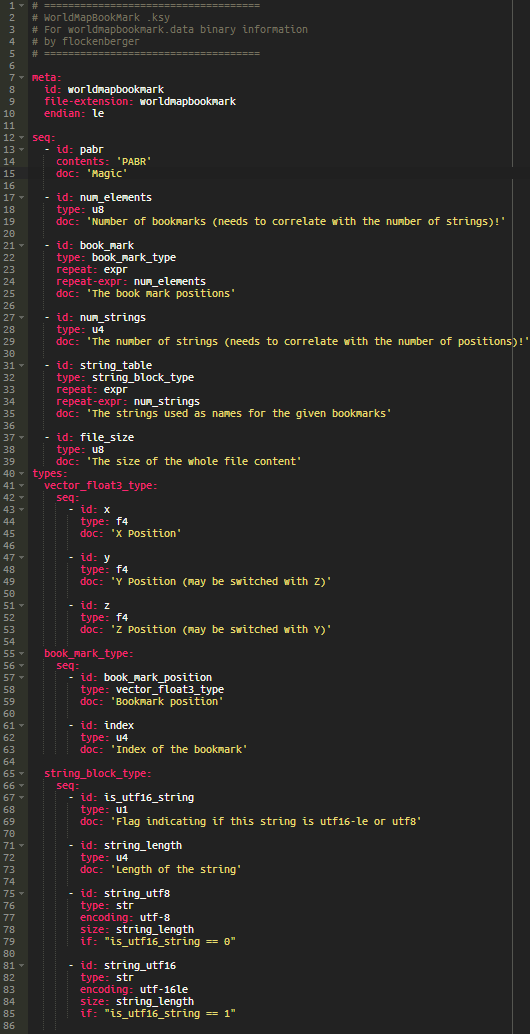
The format itself is pretty straightforward. First comes a PABR (Pearl Abyss Binary Resource) magic, followed by the number of bookmarks, as PA calles them, stored as an 8-byte integer. Then, for each entry, you have an index and a vector of three 4-byte floating point values representing the world position that this bookmark/waypoint points to. This table is then followed by a string table containing the names of the waypoints. All strings are saved as UTF-16LE since BDO is a Korean game. Lastly, the “footer” contains the size in bytes of the data (and string) part.
So far, this part was straightforward. Now that I knew the format and how to store the waypoints, let’s go into detail on how I generated the waypoints themselves.
Generating the Waypoints
First, I should mention that the code parts are all split into separate programs that run independently (if needed). Most of it is written in Java, with just a small portion in Python. The reason? Well, there isn’t really a reason. After years of writing Java code, it’s simply what I can prototype the fastest for small projects like this. However, since I was planning on using some form of blob detection, I figured I’d split that part into Python code.
Image Separation
So, with that out of the way, let’s get onto the generation process. Since the fishing map, as shown previously, consists only of solid colors without anti-aliasing, alphas, or similar effects, using blob detection was the first thing that came to mind. But I also wanted to generate some form of preview for players to see where the waypoints ultimately were. The first task was to separate the fishing map into images, each consisting of only one region. Essentially, I split every color into its own image. I did this so I could later use the same images to generate the previews - but we’ll get to that later. As a prerequisite, however, I needed all the colors and a name for each. Luckily, as mentioned before, there have been several leaks of game files over the years, and one such file is the fishing info file, which maps RGB values to the drop tables. It also includes some names that the developers assigned to the regions. Combined with community-named regions - some of names by the developers were either badly translated (from Korean to English using Google Translate) or simply didn’t make much sense for a player trying to locate that region on the map - I generated a simple CSV file containing the R, G, B values and a name for each region.
For each entry in that table, I then iterated over the original image map, compared colors, and, if they matched, stored them in a new image with the corresponding name from the table. Very straightforward, and certainly not the most efficient way of doing it, but - as is often the case when I get into a programming frenzy - I write out the first thing that comes to mind and go with it. Only once it works do I iterate over it and optimize or improve it in general.
Blob Detection
With all the images separated, it was time to perform simple blob detection. For each separated image, I loaded it in, copied it once for drawing/saving (totally not needed I know), and then converted it to grayscale to perform the blob detection on. Ultimately, it didn’t really matter whether I performed the blob detection on the grayscale images or the colored ones, but I left it that way regardless - since it worked.
image = cv2.imread(str(image_path), cv2.IMREAD_UNCHANGED)

if image is None:
    print(f"Could not read image: {image_path}")
    return

#Blob image will be used to draw into (and save)
#gray will be used to perform blob detection
blob_image = image.copy()
gray = cv2.cvtColor(image, cv2.COLOR_BGR2GRAY)

labels = skimage.measure.label(label_image=gray, connectivity=2)

#I used image as the intensity_image, didn't need to do that, but I did
regions = skimage.measure.regionprops(label_image=labels, intensity_image=image)
sorted_regions = sorted(regions, key=lambda r: r.area, reverse=True)

filtered_regions = [region for region in sorted_regions if region.area > 15][:4]
blob_centers = []
Something to note in the above code is that I sorted the regions based on size and filtered out any that were smaller than 15 pixels. The reason lies in the fishing map… Pearl Abyss was a bit sloppy when creating that map, as there are a few pixels here and there with what I can only assume are incorrect colors or misclicks. There are often random colors dotted around that don’t really make sense, but since I didn’t want the waypoints to point to single-pixel-wide areas, I only kept the largest ones.
For each region, I wanted at most four waypoints, but sometimes fewer. If a region was just one giant (or small) blob (filtered_regions = 1), I generated four random waypoints within that blob. If there were multiple blobs, I simply looped over filtered_regions and added a waypoint for each blob. I didn’t want to force exactly four waypoints every time, as I felt it wasn’t really necessary.
for region in filtered_regions:
    coords = region.coords
    random_point = coords[random.randint(0, len(coords) - 1)]
    x, y = random_point[1], random_point[0]
    blob_centers.append([int(x), int(y)])

    cv2.circle(blob_image,(int(x), int(y)),radius=7,color=(1, 1, 1, 255),thickness=-1,) #Almost black outline
    cv2.circle(blob_image,(int(x), int(y)),radius=4,color=(0, 0, 255, 255),thickness=-1,) #Red circle on top

#....
#Save blob_centers into CSV
#Save blob_image into separate folder
One important note about this code is that I did not use the centroid of the regions/blobs. The reason for that, as can be seen in the images below, is that more often than not, the fishing areas have a donut-like shape. This places the centroid outside the area, which is exactly what we don’t want. So instead, I took the coordinates of the blobs and selected a random point within each blob.
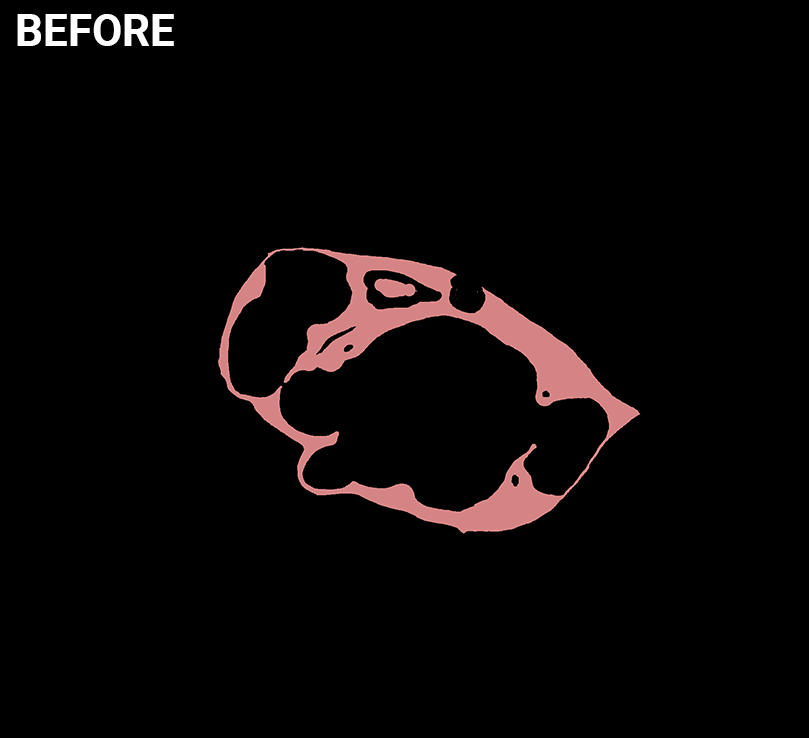
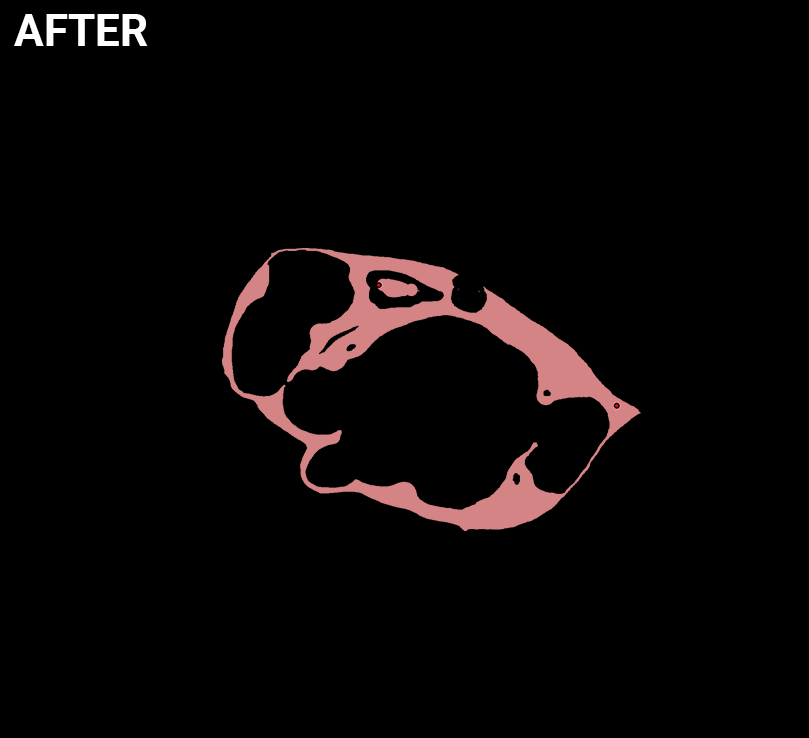
The first image shows the separated image for Arsha Sea - Depth 3. The second image shows the same area but with the found waypoints drawn into the detected blobs. (Both images are zoomed in)
With all of this done, the final step is to use the generated CSV files, convert the coordinates from pixel space to world space, and write them into the previously discussed file format. The game has a very specific way of converting these coordinates. In the following code, I’ll omit all the “hardcoded” variables. While they are crucial for this to work, they also heavily depend on the original fishing map’s image size, which is somewhere in the neighborhood of 11k x 10k pixels. However, I also don’t want to give anyone ideas on how to misuse this information to build things they shouldn’t. For those curious, though, all the variables can be found in the game files.
//x,y are pixel-space positions
public static Position3D PixelToWorldPosition(int x, int y) {
    Position2D clampedImagePos = new Position2D();
    clampedImagePos.x = (x < 0) ? 0 : ((x >= IMAGE_SIZE_X) ? IMAGE_SIZE_X - 1 : x);
    clampedImagePos.y = (y < 0) ? 0 : ((y >= IMAGE_SIZE_Y) ? IMAGE_SIZE_Y - 1 : y);

    // Reverse the y-axis transformation
    Position2D sectorPixelPos = new Position2D();
    sectorPixelPos.x = clampedImagePos.x;
    sectorPixelPos.y = -(clampedImagePos.y + 1);

    // Convert pixel position back to sector position
    Position3D sectorPos = new Position3D();
    sectorPos.x = sectorPixelPos.x * SECTOR_PER_PIXEL;
    sectorPos.z = sectorPixelPos.y * SECTOR_PER_PIXEL;

    // Translate back to the original sector coordinate system
    sectorPos.x += LEFT;
    sectorPos.z += TOP;

    // Convert sector position back to world position
    Position3D worldPos = new Position3D();
    worldPos.x = sectorPos.x;
    worldPos.y = sectorPos.y;
    worldPos.z = sectorPos.z;
    worldPos.times(WORLD_POSITION_FACTOR);

    return worldPos;
}
And with that, we have successfully generated waypoints for each region in the original fishing map. The whole process - from separating the image, performing blob detection, and converting positions to binary format - takes around 2-3 minutes. It only takes that long because of the huge image sizes (and surely not because of my inefficient code :D).
The Previews
As previously mentioned, one of the things I really wanted to do was generate usable preview images so players know where they are headed.
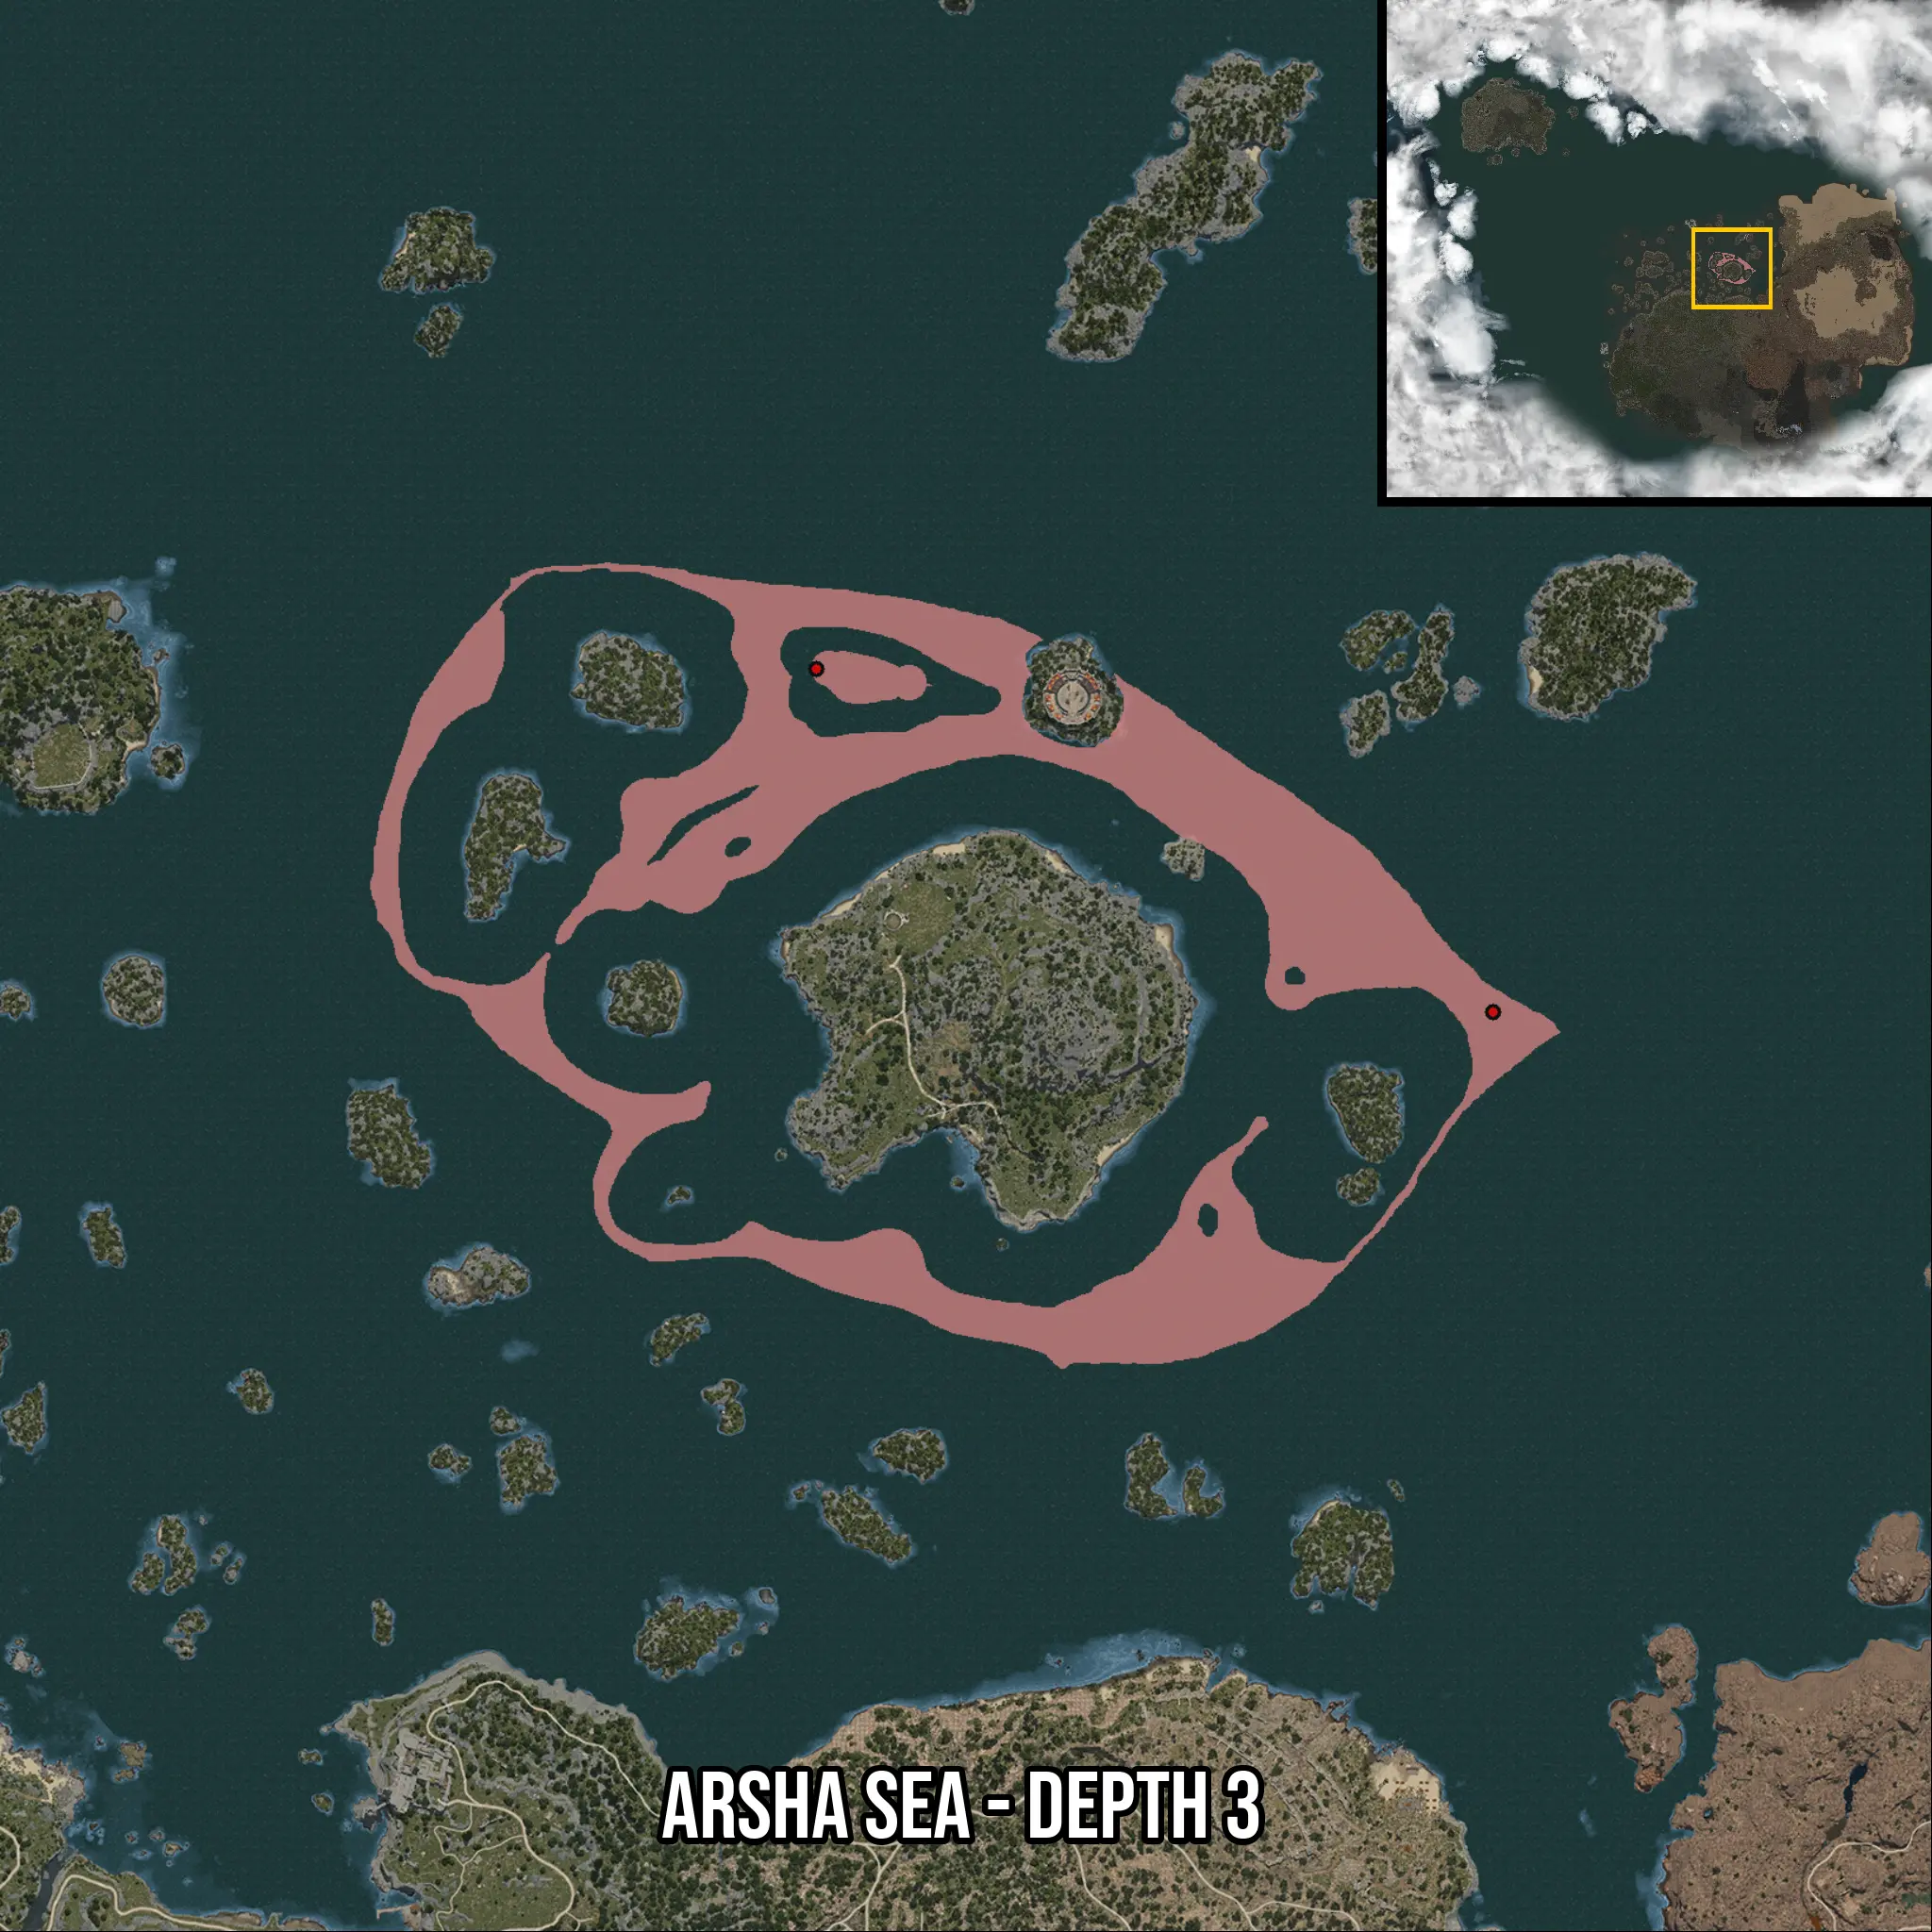
I wanted the preview images to display the name of the area and include a small zoomed-out version in the top right corner to give players a rough idea of where the region is on the map. For this, we also need the minimap from the game. The minimap is tile-based, with each tile being 128 x 128 pixels in size. The entire map has a resolution of 31k x 27k pixels, which is way too big. So the first thing I did was scale the image down and align it with the fishing map, ensuring the regions matched. Instead of trying to properly map it, I simply eyeballed the alignment in Photoshop. For preview images, this approach is perfectly fine and is only off by a few pixels - if at all - so it works out.
With both the individual region images and the background minimap prepared, it became very easy to overlay the images in code. Before saving the regions with the waypoints on top, I stripped the background and replaced it with full transparency.
As you may have noticed in the preview image above, there is a zoomed-in section of the region. This is done dynamically in code. First, I calculate the min XY and max XY pixel bounds of the fishing region, then combine the waypoint image with the minimap. The result is then used as input for the method below. This method dynamically calculates the zoom level per image and translates it into a new image with a given output size. The same method also draws the orange rectangle on the smaller-sized map in the top right corner, but I have stripped that part of the code here to keep things concise.
public static BufferedImage zoomToLocation(BufferedImage originalImage, int outputSizeX, int outputSizeY, Rectangle regionBoundingBox) {

    //Target in this case is the center of the bounding box
    int targetX = regionBoundingBox.x + regionBoundingBox.width / 2;
    int targetY = regionBoundingBox.y + regionBoundingBox.height / 2;

    //Calculating the zoom level based on the output sizes and clamping it between
    //some empirical values I found work well
    double zoomLevel = Math.max(regionBoundingBox.width / (double) outputSizeX, regionBoundingBox.height / (double) outputSizeY);
    zoomLevel = Math.max(0.8, Math.min(10, zoomLevel));


    int captureSize = (int) (Math.max(outputSizeX, outputSizeY) * zoomLevel);
    int captureX = targetX - (captureSize / 2);
    int captureY = targetY - (captureSize / 2);

    BufferedImage zoomedImage = new BufferedImage(outputSizeX, outputSizeY, originalImage.getType());
    Graphics2D g2d = zoomedImage.createGraphics();
    g2d.setRenderingHint(RenderingHints.KEY_INTERPOLATION, RenderingHints.VALUE_INTERPOLATION_BILINEAR);

    int sourceX = Math.max(0, captureX);
    int sourceY = Math.max(0, captureY);
    int sourceWidth = Math.min(captureSize, originalImage.getWidth() - sourceX);
    int sourceHeight = Math.min(captureSize, originalImage.getHeight() - sourceY);

    int destX = (int) ((sourceX - captureX) / zoomLevel);
    int destY = (int) ((sourceY - captureY) / zoomLevel);
    int destWidth = (int) (sourceWidth / zoomLevel);
    int destHeight = (int) (sourceHeight / zoomLevel);

    g2d.setColor(Color.BLACK);
    g2d.fillRect(0, 0, outputSizeX, outputSizeY);
    g2d.drawImage(originalImage, destX, destY, destX + destWidth, destY + destHeight, sourceX, sourceY,
        sourceX + sourceWidth, sourceY + sourceHeight, null);
    g2d.dispose();

    return zoomedImage;
}
And the rest is just scaling down the images and layering them together. Keen eyes among you may have noticed that the smaller image in the top right looks different from the minimap, and that’s correct. I used the terrain map instead because it looked better when scaled down. But the same eyeballing method to properly align that and the fishing map apply.
The Result
With everything set up, I simply let the process run through all the images. The nice thing about this setup is that it works with just three files: a CSV with colors and names, the fishing image (or any other image that needs to be separated - BDO provides several), and the background minimap. The preview image generation takes the longest, at roughly 13 minutes, due to the large image sizes involved. Overall, I’m quite happy with how it turned out - it was a fun project to work on.
The Format Change
However, just a few weeks after I first released the files on GitHub, Pearl Abyss changed the way waypoints are stored and completely removed the previous cache file. Stumped as to why players reported that the waypoints no longer worked, I had to start my search anew to figure out where they were being saved this time.
Luckily, they had decided to store them alongside all other game user settings in an XML document. Slightly disappointed that I wouldn’t be working with binary files anymore, I took a look at how the waypoints were structured in this new format. Pearl Abyss has a habit of making XML files that are often poorly formatted, and this time was no exception. However, at least the waypoint data was easy to generate.
Instead of generating a binary file, I could now simply switch to the XML output below. If they had made this change just a few weeks earlier, it would have saved me some time reversing and writing a custom writer for their cache file.
<!--
    Waypoints for: Arsha Sea - Depth 3
    Auto-Generated by: flockenberger
    Preview at: https://github.com/Flockenberger/bdo-fish-waypoints/tree/main/Bookmark/Arsha%20Sea%20-%20Depth%203
-->
<WorldmapBookMark>
    <BookMark BookMarkName="0: Arsha Sea - Depth 3" PosX="291237.6928091049" PosY="0" PosZ="323162.31920719147" />
    <BookMark BookMarkName="1: Arsha Sea - Depth 3" PosX="118362.39531040192" PosY="0" PosZ="410804.6738624573" />
</WorldmapBookMark>
Now, players need to manually replace the WorldmapBookMark xml node, but at least they can see exactly what they’re replacing.
Conclusion
To wrap up this little rabbit hole, I just want to say that this was a really fun project. Ironically, I didn’t even do this for myself - I don’t really fish in the game - but seeing so many players struggle to find the correct spot, having to cross-reference different websites with their in-game minimap, and even using Photoshop to figure things out, seemed like a real hassle.
For now, I won’t be releasing the full code. But for anyone interested in doing something similar, this write-up should get you started. Given the specifics of this use case, I doubt there will be many people attempting it anyway. :D